
How to Propagate Monstera Deliciosa
Monstera Deliciosa is one of the easiest houseplants to propagate. Here are three reliable methods — choose the one that fits your comfort level and available supplies.
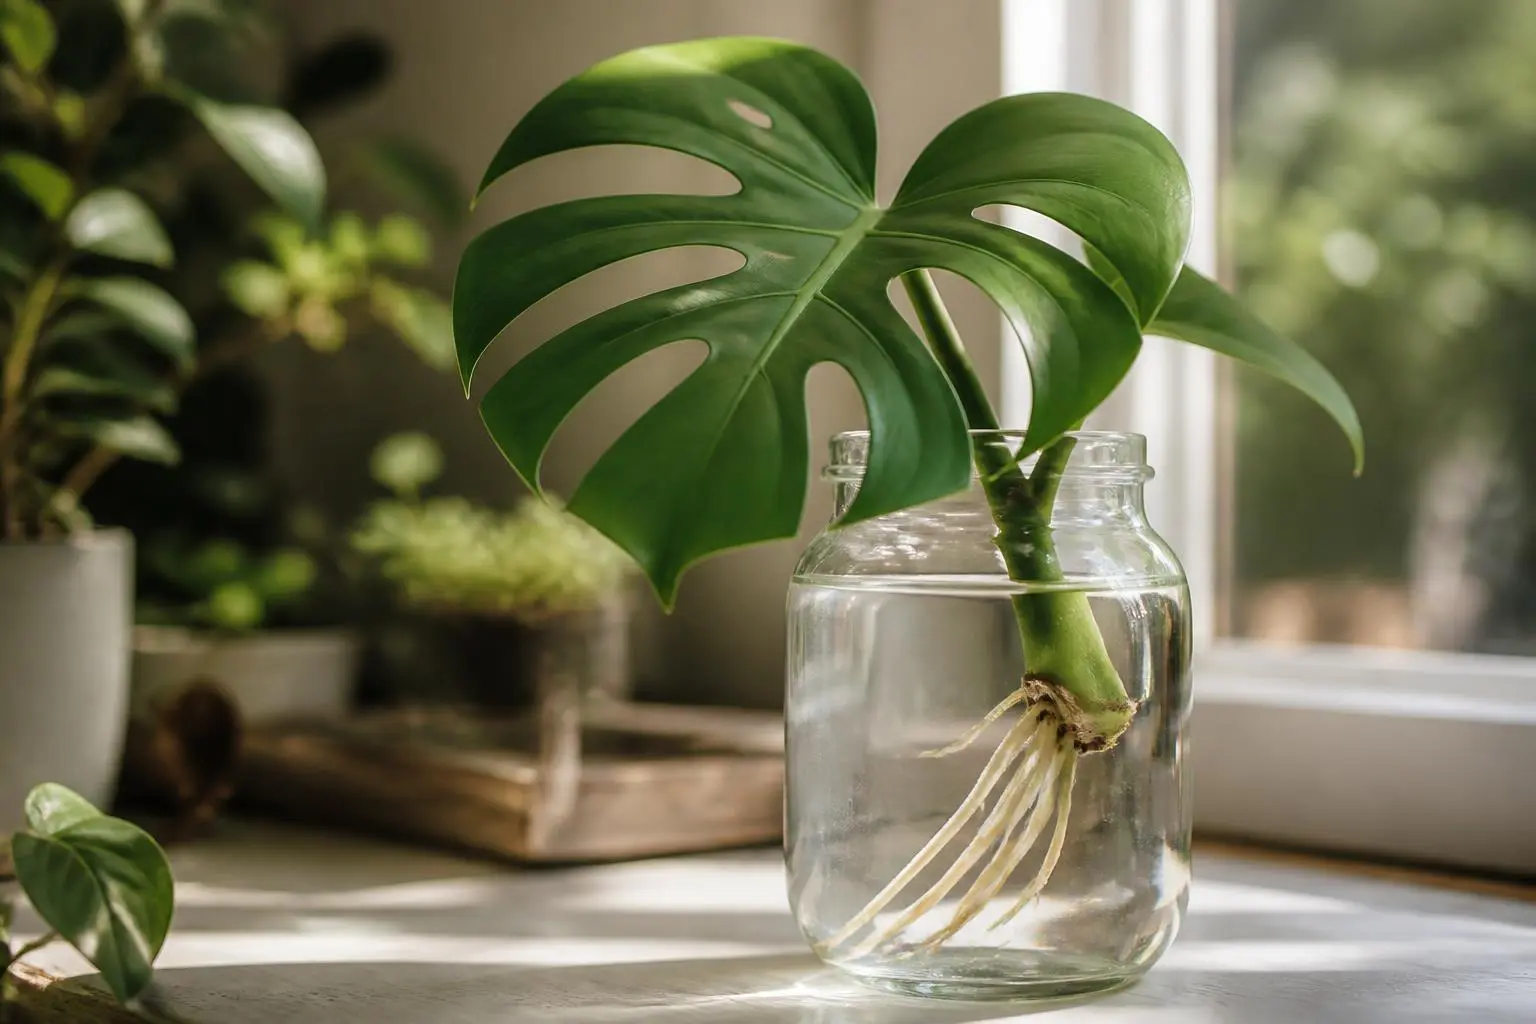
Water propagation
This is the most popular and visually satisfying method because you can watch roots develop in real time. You will need clean sterilized scissors or a sharp knife, a glass jar or vase, room-temperature water (filtered or left out overnight is best), and optionally rooting hormone powder.
- 1 Select a healthy stem section with at least one node (the bumpy point where a leaf meets the stem, often with an aerial root nub) and 1–2 mature leaves.
- 2 Cut about 1 inch below the node using sterilized scissors.
- 3 Remove the lowest leaf if it would sit below the water line, as submerged leaves will rot and foul the water.
- 4 Place the cutting in a jar of room-temperature water, ensuring the node is fully submerged but no leaves touch the water.
- 5 Position the jar in bright indirect light — avoid direct sun which heats the water and promotes algae.
- 6 Change the water every 5–7 days, rinsing the jar to prevent bacterial growth.
- 7 Watch for root emergence from the node, typically beginning in 2–3 weeks.
- 8 Once roots are 2–3 inches long (typically 4–6 weeks total), transplant into aroid soil mix in a pot with drainage holes. Water thoroughly after planting and keep in slightly lower light for a week to reduce transplant shock.
Expected timeline: roots appear in 14–21 days, ready to transplant by week 4–6, new leaf emerges 6–10 weeks after potting. Success rate: approximately 85–95% with healthy cuttings and clean water changes.
Success rate: approximately 85–95% with healthy cuttings and clean water changes.

Soil propagation
This method skips the water-to-soil transition, which can sometimes shock delicate water-grown roots, making it ideal for growers who want a more seamless rooting process. You will need sterilized scissors, rooting hormone powder (optional but recommended, especially for cuttings without aerial roots), a small pot with drainage holes, pre-moistened aroid soil mix, and a clear plastic bag or propagation dome.
- 1 Take a cutting as described above, with at least one node and 1–2 leaves.
- 2 Dip the cut end and node in rooting hormone, tapping off excess.
- 3 Plant directly into moist aroid mix, burying the node about 1 inch deep.
- 4 Water lightly to settle the soil around the cutting.
- 5 Cover with a clear plastic bag or propagation dome to maintain 80%+ humidity around the cutting.
- 6 Place in bright indirect light and keep the soil consistently moist but never soggy — check every 3–4 days.
- 7 Remove the cover for an hour each day after week 3 to gradually acclimate the cutting to ambient humidity.
- 8 Once new growth appears (typically 4–6 weeks), remove the cover entirely and begin treating it as a normal Monstera.
Expected timeline: roots form underground in 3–4 weeks, new leaf emerges in 4–6 weeks, established plant by 8–10 weeks. Success rate: approximately 75–85% without rooting hormone, 85–90% with rooting hormone.
Success rate: approximately 75–85% without rooting hormone, 85–90% with rooting hormone.
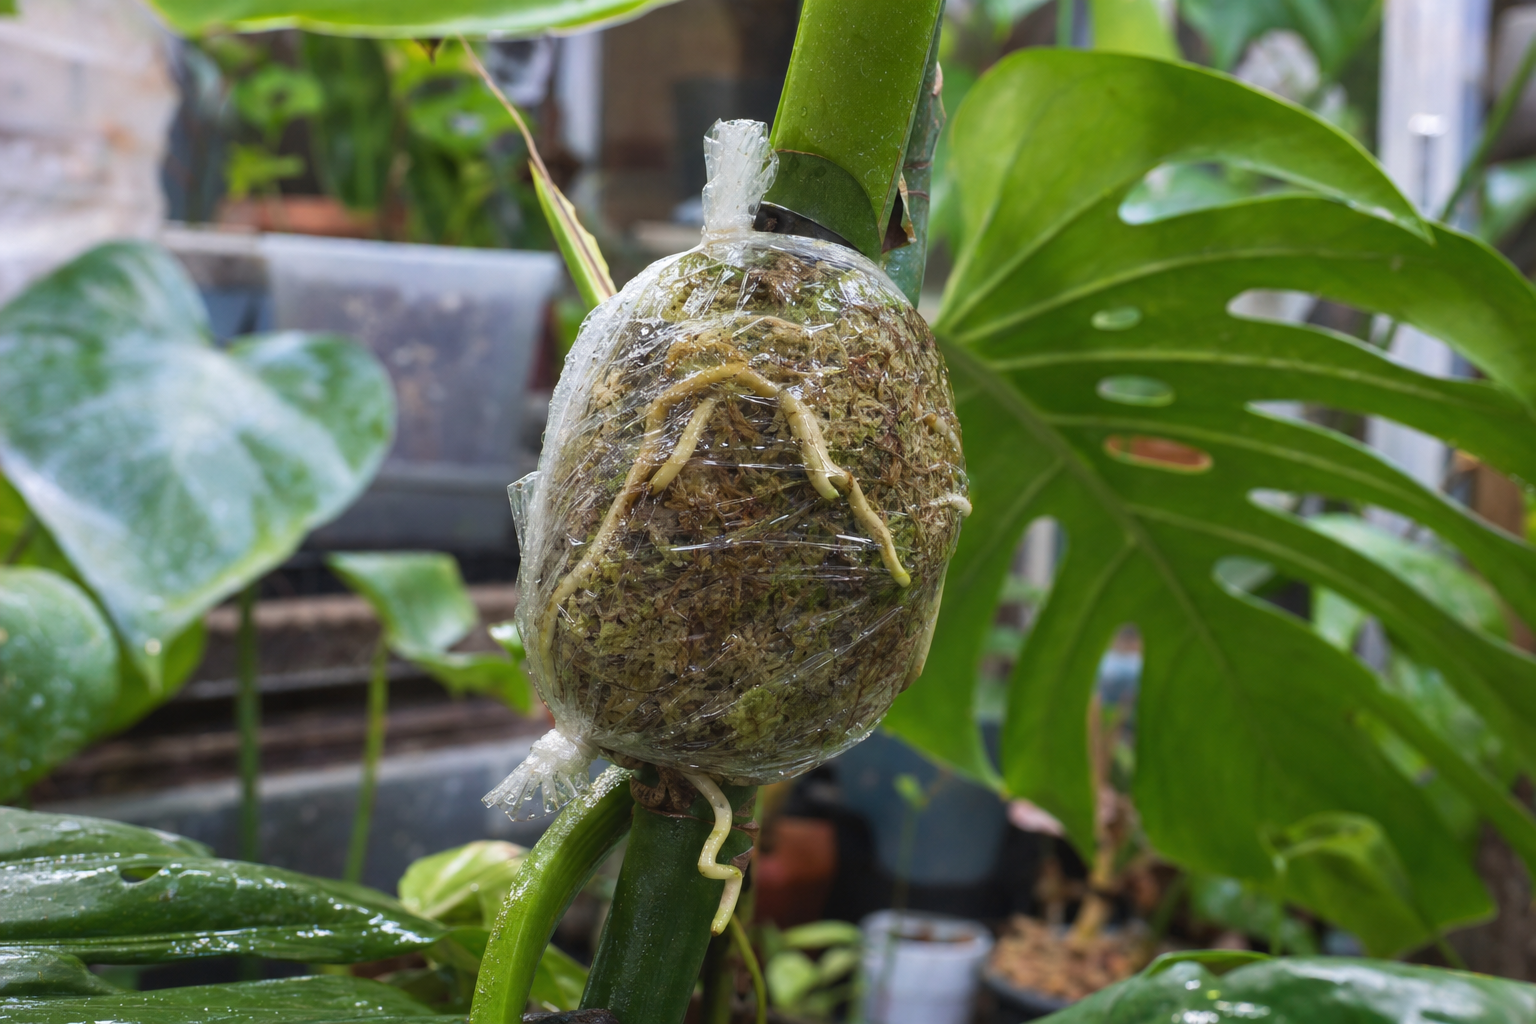
Air layering
This is the gold standard for maximum success rate, especially on large, mature plants where you want to be certain the cutting will survive. Air layering allows roots to develop while the cutting is still attached to the parent plant, so it continues receiving water and nutrients throughout the rooting process. You will need a clean sharp knife, moist sphagnum moss (soaked and squeezed to damp, not dripping), plastic wrap, twist ties or twine, and optionally rooting hormone.
- 1 Select a healthy stem with a node that has an aerial root or visible root nub.
- 2 Make a small upward diagonal cut about halfway through the stem just below the node, or scrape the bark to expose the green tissue beneath.
- 3 Apply a small amount of rooting hormone to the cut area (optional).
- 4 Wrap a generous handful of moist sphagnum moss around the node and cut, covering it completely.
- 5 Wrap the moss with plastic wrap, securing tightly above and below with twist ties or twine to hold moisture in.
- 6 Check the moss every 2 weeks — if it feels dry, carefully open the top, mist the moss with water, and reseal.
- 7 After 4–8 weeks, you should see roots growing through the moss.
- 8 Once the root ball is well-developed (roots visible throughout the moss), cut the stem about 1 inch below the rooted section and pot it up in aroid soil mix.
- 9 Keep the newly potted plant in bright indirect light with slightly higher humidity for 1–2 weeks as it adjusts.
Expected timeline: roots visible in moss at 4–6 weeks, ready to separate by week 6–8, new growth within 2–4 weeks after potting. Success rate: approximately 90–98%, the highest of any Monstera propagation method.
Success rate: approximately 90–98%, the highest of any Monstera propagation method.
Troubleshooting Common Issues
Cutting rotting in water
If the stem turns brown or mushy and the water becomes cloudy or foul-smelling, bacterial rot has set in. Remove the cutting immediately, cut away all mushy tissue until you reach firm, green stem, and start fresh with clean water and a sterilized jar. Adding a small piece of activated charcoal to the water can help prevent future bacterial growth. Ensure no leaves are submerged and change water religiously every 5 days.
No roots after 3–4 weeks
This is usually caused by insufficient warmth or light. Monstera cuttings root best at 70–80°F (21–27°C). Move the cutting to a warmer spot with brighter indirect light. If using water propagation, ensure the node is fully submerged. Cuttings taken in fall or winter root much more slowly due to shorter days and cooler temperatures — patience is key, and you may need to wait 6–8 weeks for roots during the dormant season. A heat mat set to 75°F can dramatically speed up rooting.
Wilting after transplant
Wilting or drooping leaves after moving a water-rooted cutting to soil is common and usually temporary — the roots need time to adapt from water to soil. Keep the soil consistently moist (not soggy) and increase humidity around the plant with a plastic bag or dome for the first week. Avoid direct sunlight during this adjustment period. Most cuttings recover within 7–14 days as soil roots develop.
New leaves are small or lack fenestrations
Newly propagated Monsteras typically produce smaller, solid leaves for the first several growth cycles. This is completely normal — fenestrations develop as the plant matures and receives adequate light. Ensure the new plant gets bright indirect light and regular fertilizing during the growing season. Mature fenestrated leaves typically begin appearing after the plant has 4–6 leaves and a well-established root system, which can take 6–12 months from propagation.
Propagation Tips
- ✓ Always use clean, sterilized tools to prevent infection
- ✓ Cuttings need bright indirect light — never direct sun
- ✓ Change propagation water every 5–7 days to prevent bacteria
- ✓ Be patient — rooting takes 2–6 weeks depending on the method
- ✓ Spring and summer are the best seasons for propagation