
How to Propagate Pothos
Pothos is one of the easiest houseplants to propagate. Here are three reliable methods — choose the one that fits your comfort level and available supplies.
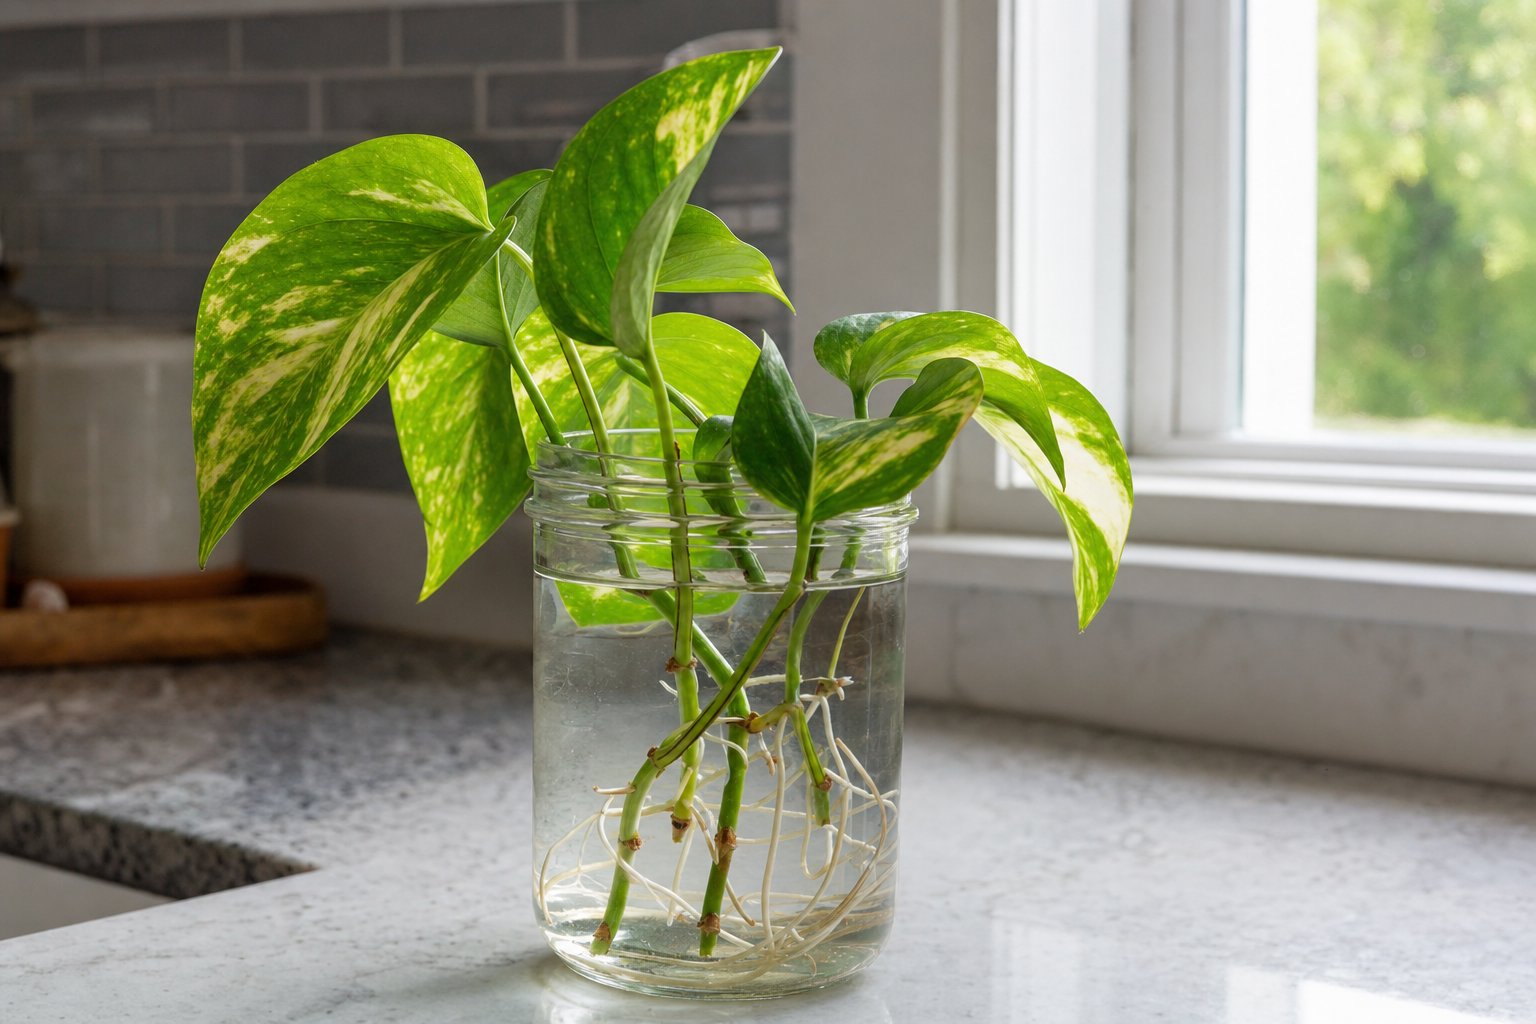
Water propagation (easiest and most popular)
You will need clean scissors or a sharp knife, a glass jar or vase, room-temperature water, and optionally a few pebbles to hold stems in place.
- 1 Identify a healthy vine with several nodes — the small bumps where leaves attach to the stem, often with tiny root nubs already visible.
- 2 Cut a section 4–6 inches long, making the cut about 1/4 inch below a node.
- 3 Remove the bottom 1–2 leaves so the node is fully exposed — any leaves left below the water line will rot and foul the water.
- 4 Place the cutting in a jar of room-temperature water, ensuring at least one node is submerged but no leaves touch the water.
- 5 Position the jar in bright indirect light — a windowsill that receives morning sun is ideal.
- 6 Change the water every 5–7 days, rinsing the jar each time to prevent bacterial growth.
- 7 Watch for white, thread-like roots emerging from the submerged nodes, typically beginning in 7–14 days.
- 8 Once roots are 2–3 inches long (typically 3–4 weeks total), transplant into well-draining potting soil.
- 9 Water the newly potted cutting thoroughly and keep the soil consistently moist for the first 2 weeks as the plant transitions from water roots to soil roots.
- 10 After 2 weeks, resume normal watering when the top inch of soil is dry.
Expected timeline: roots appear in 7–14 days, ready to transplant by week 3–4, new vine growth by week 5–6. Success rate: approximately 95–100% with healthy cuttings.
Success rate: approximately 95–100% with healthy cuttings.

Soil propagation
This method eliminates the sometimes-tricky water-to-soil transition and produces sturdier root systems from the start. You will need clean scissors, a small pot with drainage holes, pre-moistened potting mix, rooting hormone powder (optional), and a clear plastic bag or propagation dome.
- 1 Take a cutting as described above, with at least one node and 2–3 leaves.
- 2 Dip the cut end and exposed node in rooting hormone, tapping off excess — this is optional for pothos but speeds up root formation by about a week.
- 3 Make a small hole in the moist potting mix with a pencil or chopstick.
- 4 Insert the cutting so the node is buried about 1 inch deep, and gently firm the soil around the stem.
- 5 Water lightly to settle the soil.
- 6 Cover the pot with a clear plastic bag or propagation dome to maintain high humidity — this is especially important in dry homes.
- 7 Place in bright indirect light and keep the soil consistently damp (not soggy) for the first 2 weeks while roots develop.
- 8 Remove the humidity cover after 2–3 weeks once you see new growth, gradually acclimating the plant to ambient humidity over 3–4 days.
- 9 Resume normal care — water when the top inch of soil is dry.
Expected timeline: roots form underground in 2–3 weeks, new growth visible at 3–4 weeks, established plant by 6–8 weeks. Success rate: approximately 85–95%.
Success rate: approximately 85–95%.
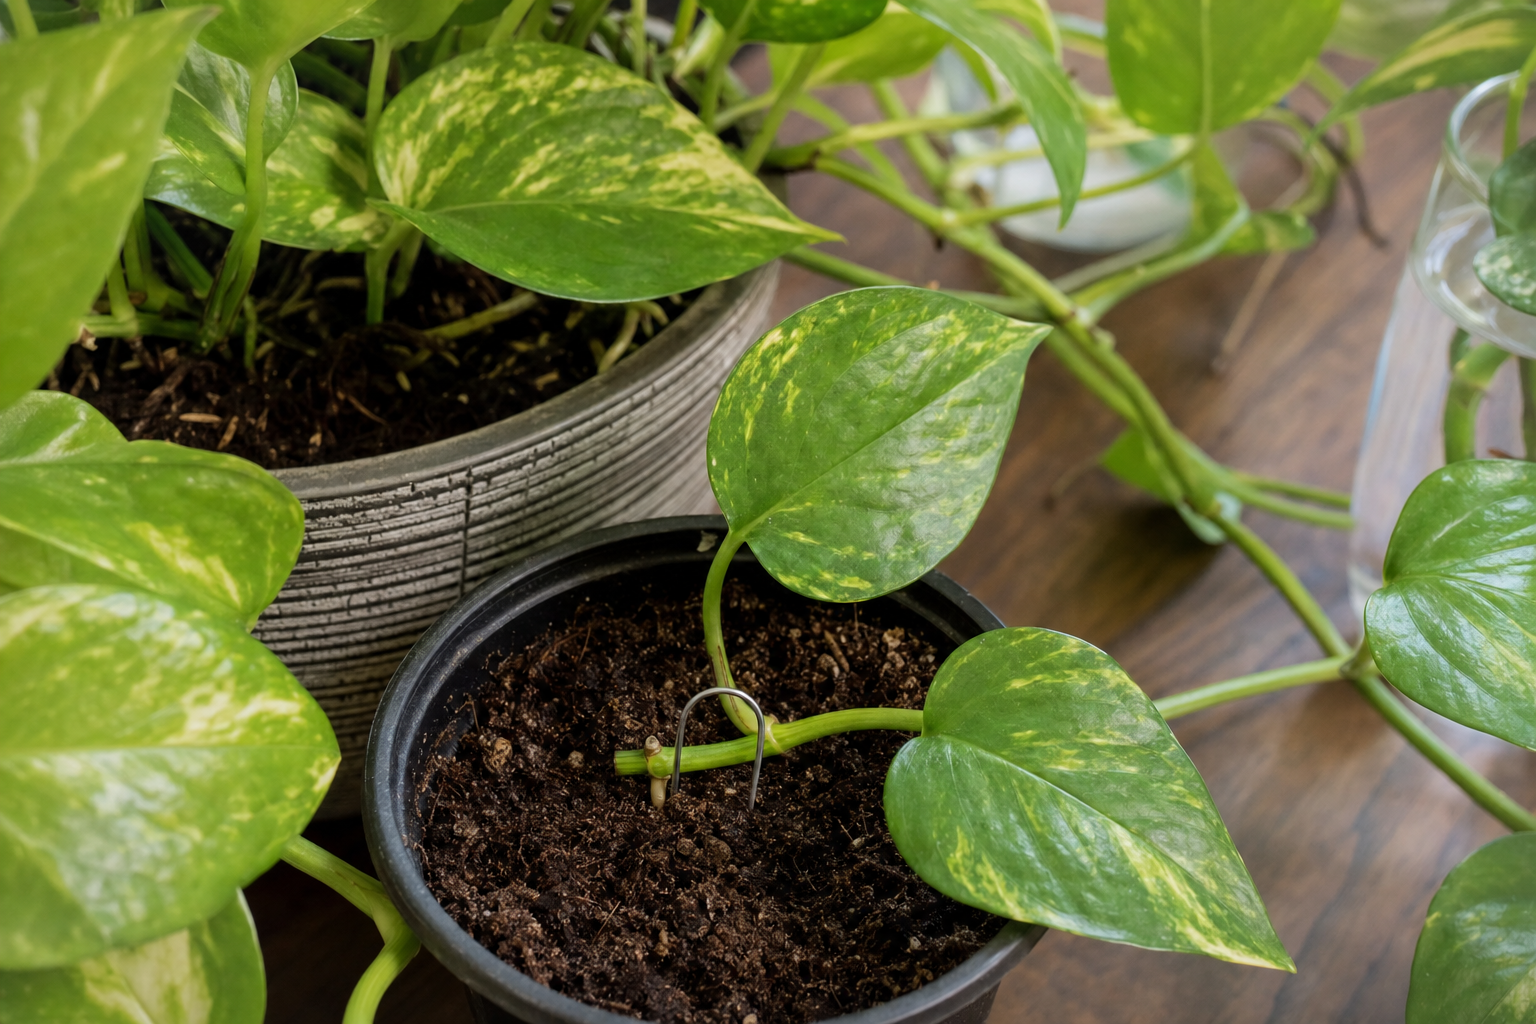
Rooting in the same pot (self-layering)
This is the easiest and most foolproof method for making an existing pothos look fuller without creating a separate plant. You need nothing more than a bobby pin, paperclip, or U-shaped wire.
- 1 Identify a vine that is long enough to reach the soil surface.
- 2 Find a node along the vine where you want roots to form.
- 3 Remove the leaf at that node if present, exposing the node.
- 4 Pin the node down into the soil of the same pot using a bobby pin or bent paperclip, burying the node about 1/2 inch deep.
- 5 Keep the soil consistently moist at the pinned point.
- 6 The node will root while still attached to the mother plant, receiving water and nutrients through the vine.
- 7 After 2–3 weeks, give the vine a gentle tug — if you feel resistance, roots have formed.
- 8 You can either snip the vine connection to create an independent stem, or leave it attached for a naturally fuller plant.
Expected timeline: roots form in 2–3 weeks, new growth from rooted node in 4–5 weeks. Success rate: approximately 95–100%.
Success rate: approximately 95–100%.
How many cuttings for a full plant
For a lush, full new plant, use 3–5 cuttings in one pot rather than a single cutting. Space them evenly around the pot, each with at least one node buried in the soil. Single cuttings will eventually fill out but take 2–3 months longer to look impressive. Using multiple cuttings creates an immediately fuller appearance and encourages the plant to bush out rather than send out a single trailing vine.
Troubleshooting Common Issues
Cuttings rotting in water
If the stem turns brown or mushy and the water becomes cloudy with a foul smell, bacterial rot has taken hold. Remove the affected cutting immediately before it spreads to others in the same jar. If any part of the vine is still firm and green, recut 1 inch above the rot line with clean scissors, remove any leaves that would sit below water, and restart in a clean jar with fresh water. Prevent future rot by ensuring no leaves are submerged, changing water every 5–7 days, and keeping the jar out of direct sunlight which warms the water and promotes bacteria.
No roots after 2–3 weeks
Pothos normally roots in 7–14 days, so a delay usually indicates environmental issues. The most common cause is insufficient light — move the cutting to a brighter spot with indirect light. Temperature also matters: pothos roots fastest at 70–80°F (21–27°C). Cuttings taken in fall or winter naturally root more slowly due to shorter days; a heat mat can help. Also verify that a node is actually submerged — the roots emerge from the node, not the cut end, so if the node is above the water line, no roots will form. Finally, check that you cut below a node, not between nodes — a stem section with no node cannot produce roots.
Wilting or yellowing after transplant from water to soil
This is the most common post-propagation problem and is caused by the transition from water roots (which are fragile and adapted to aquatic conditions) to soil roots (which need to be sturdier and more branching). To minimize shock, transplant when roots are 2–3 inches long — not longer — as very long water roots have a harder time adapting. Keep the soil consistently moist (not soggy) for the first 2 weeks after transplanting, and increase humidity with a plastic bag dome if leaves are drooping. Most cuttings recover within 7–10 days as new soil-adapted roots develop. Avoid fertilizing for the first month after transplanting.
New plant growing slowly or producing small leaves
Newly propagated pothos plants need time to build a root system capable of supporting vigorous growth. Ensure the plant is in bright indirect light and receiving consistent moisture. After 4–6 weeks, begin a monthly fertilizing routine with diluted balanced fertilizer. Small leaves on new growth are normal for the first few months and will increase in size as the root system matures. If after 3 months the plant is still struggling, check that the pot is not too large (excess soil stays wet too long) and that the soil drains well.
Propagation Tips
- ✓ Always use clean, sterilized tools to prevent infection
- ✓ Cuttings need bright indirect light — never direct sun
- ✓ Change propagation water every 5–7 days to prevent bacteria
- ✓ Be patient — rooting takes 2–6 weeks depending on the method
- ✓ Spring and summer are the best seasons for propagation